
|
So now you have an image or series of images you would like to convert to pdf format, but you don't know how to go about it. There are a lot of programs that allow you to convert to pdf. Some are free and some charge. It ranges and for the most part you need to install software and some plugins to get a program to do it for free on the windows OS.
Before I get into specifics lets get to the facts. The pdf format doesn't compress the image files at all. It's a straight transfer from whatever image format you have into pdf. Next, you want to make sure you have all the files named properly in the order you want them. Numbering works well for this. A good example is (01, 02, 03 etc). You need to have the files named that way so you can have the images organized in the way you want it with the pdf file that you create. |
|
Now to get started on it all. I use the Mac OS for this. Open your image in "preview" and then go to "save as", save your image with whatever name you wish as long as it's in an organized way (01, 02, 03 etc). Repeat this with all of the images you want into a single pdf file. Usually I make a folder for all of the images and throw them in there. It simplifies the process for me.
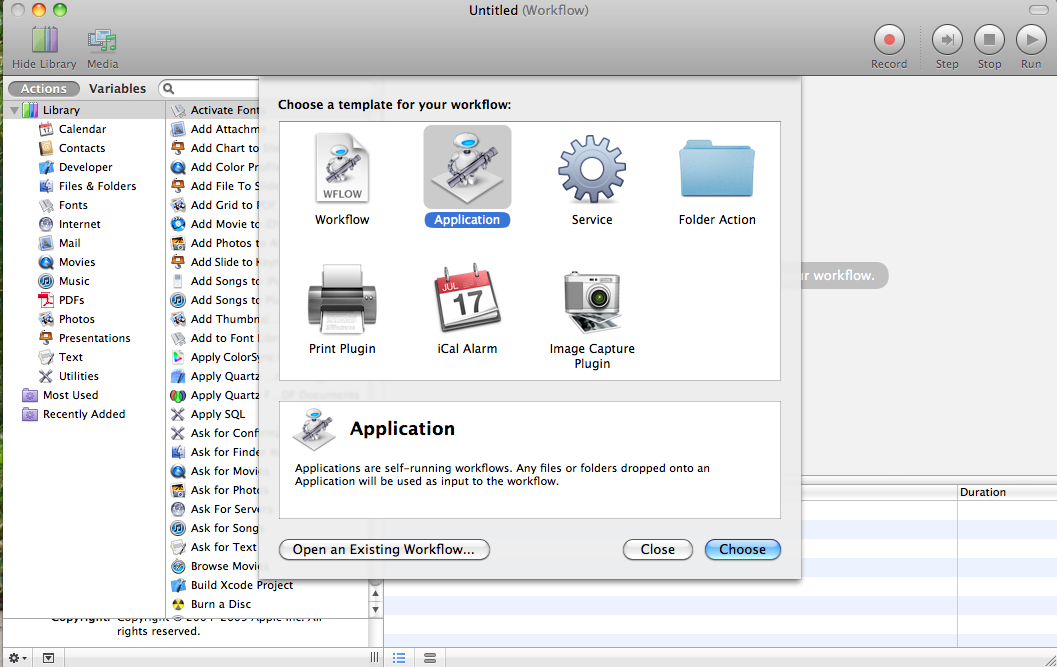
Once you're done converting all of the files to pdf one by one it is time to move onto the next step. Open "Automator". Now that you opened Automator choose "Application". Now you want to highlight all of the files in your folder that you saved to pdf earlier and drag them into the window. This is a whole lot quicker for me. |
|
|
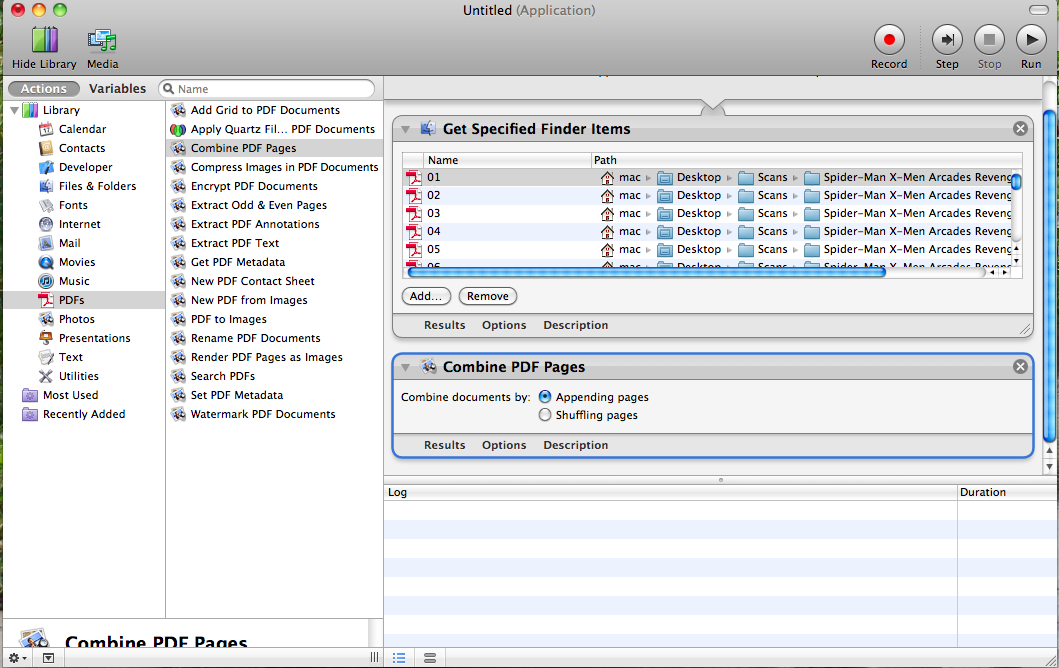
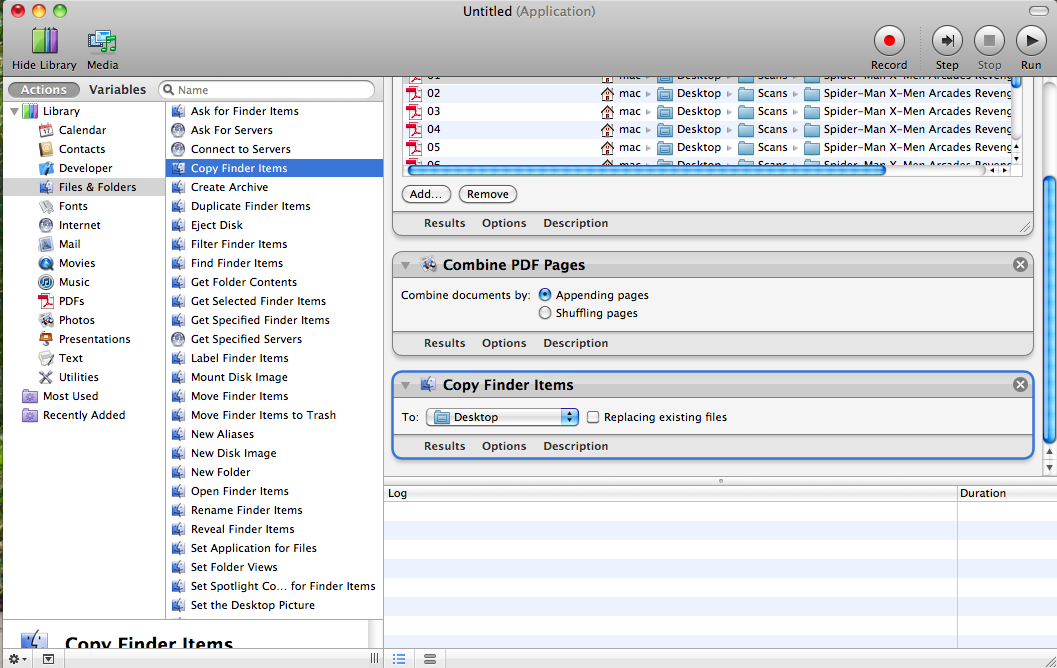
On the left hand side there is a section under "library" that contains a bunch of different actions to take. Choose "PDFs" and select "Combine PDF Pages". Make sure "Appending pages" is selected. After having placed that action you'll want to have the file in an easy to get place. So choose "Files & Folders" and select "Copy Finder Items". This will allow you to save the file in a place you decide.
I like to name the files I create as well and if you want to do that then simply go to "Rename Finder Items", select "Name Single Item" in the area where it has "Add Date or Time" and make sure it says "Basename only". Once you're ready to create your file, click on "Run". Automator runs through each task in the order you set them in. |
|
If you wish to compress the files it's best to do that before you Append them. You can compress the files by going "PDFs" and then selecting "Compress Images in PDF Documents". You can select between Uncompressed, Flate and JPEG, but JPEG is the only one you can really compress images with.
Another thing I like to do is put a watermark on my files so no one takes it as their own. To do this go back into "PDFs" and select "Watermark PDF Documents". Click on "Add…" to select an image that you made or want on your pdf file. You can select if you want the watermark over or under the images, the position (Offset), resize it (Scale), Angle you want it at and the Opacity (visibility). I find that a png image file works well for a watermark. |

|
